Today, we’re going to be engraving a custom fire fighting bear logo on wood. This includes: generating a logo, importing a typeface, setting up in the xTool Creative Space, and finally engraving.
Tools:
Material:
- Dark hard wood
Safety:
- Lasers are inherently hazardous, use appropriate precautions
- Wood is flammable, use appropriate precautions
Logo Design:
The steps below are how I designed this logo, if you already have a logo you can skip this step.
Logo concept: I knew I wanted something with an intense bear, also with fire fighting elements (like a hat, or a bear in a badge). I didn’t have anything too specific in mind, outside of looking really cool, not being obviously AI generated, and something the user would appreciate.
Making art: if you are an artist I suppose you could draw the logo, or design digitally, or whatever you artists do. Unfortunately, I can’t draw and am not very artistic. For this project, I’m going to generate the design using generative AI (Stable Diffusion).
Pro tip: I’ll be using getimg.ai, but you can use any AI-generation tool
I am not sponsored, or affiliated, with getimg.ai, it’s just what I use
- Log into your generator of choice – I’ll be using getimg.ai. Open the generation page.
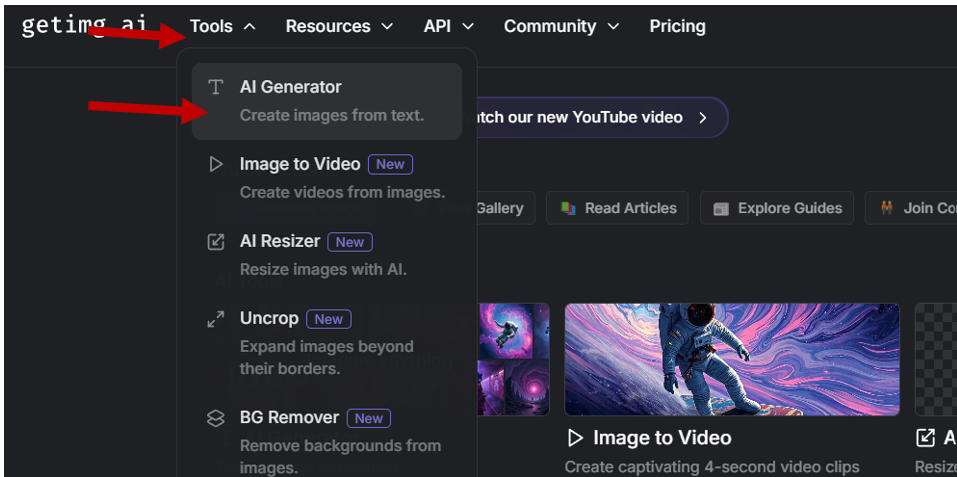
2. Input what you want a image of. Below is what I finished with after about a dozen refinements:
Details of image generation: Fire Bear Logo
Mode: Text to Image generation
Generation Type: SD
Prompt (what we want in the image):
(a fire fighter, fire fighter badge. fire axe. no background.), woman bear, cute. geometric.
A stylized logo featuring a bear (fire fighter), designed in a geometric art style. The bear should be depicted in a dynamic pose, with sharp, angular lines that emphasize its fierce expression. The shark mouth should be exaggerated, showcasing sharp teeth and a playful yet intimidating vibe. Use a limited color palette with bold contrasts, incorporating shades of blue, gray, and earthy tones. The background should be minimalistic, focusing on the geometric elements and the unique animal combination.
Negative Prompt (what we don’t want in the image):
Disfigured, cartoon, blurry, nude, background, weapon
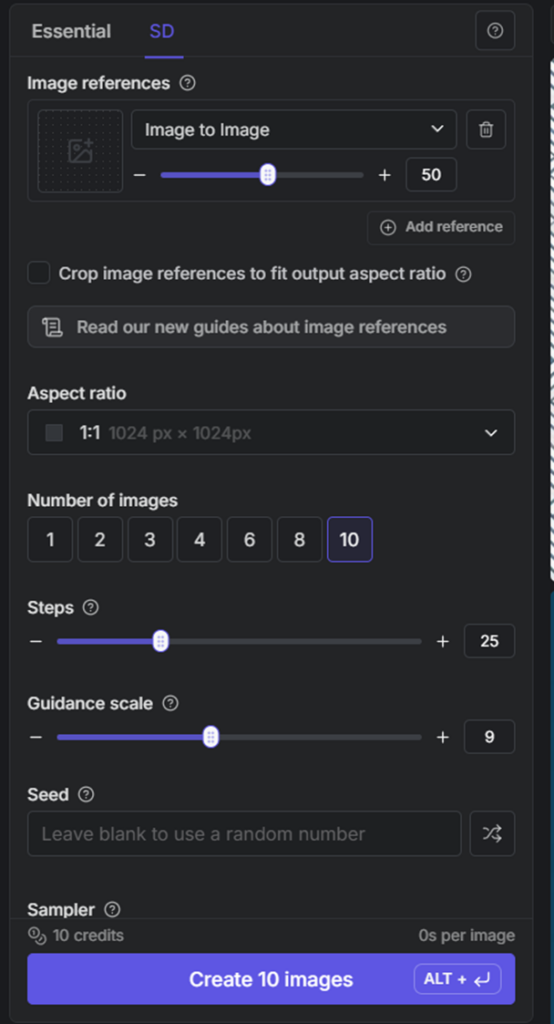
Number of images: Start with two until you get close to what you want, then go up to 10 when you’re pretty close
Steps: 25
Guidance Scale: 9
Sampler: LMS Karras
Again, change whatever you want in these settings to get your desired image
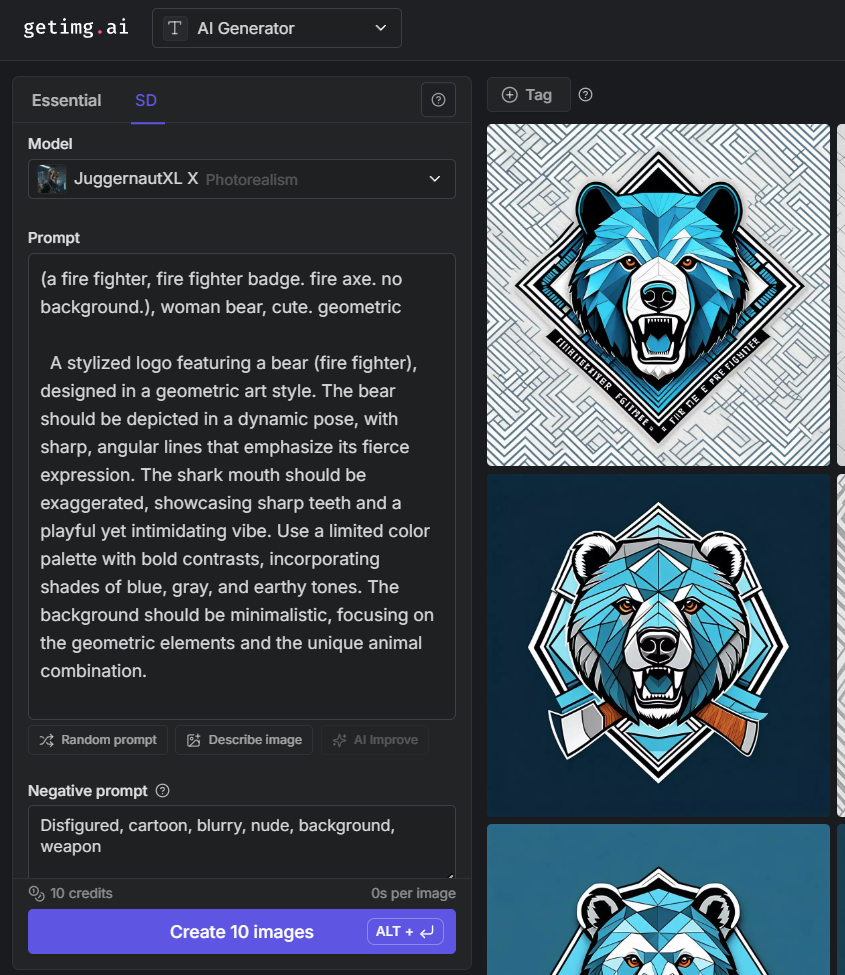
Image generation settings continued:
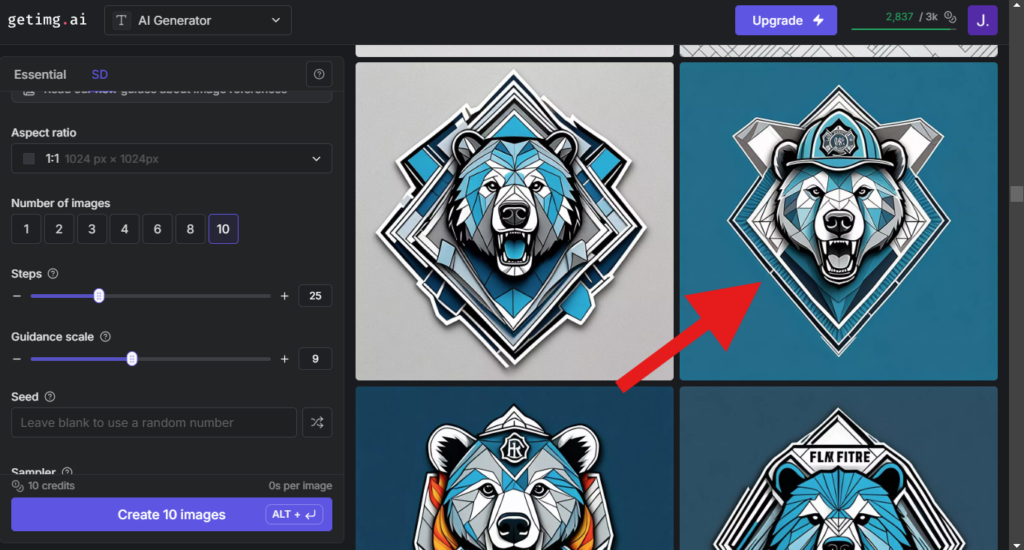
Generate and iterate (you may need to change the prompt and settings) until you are happy with the result. For me, this typically takes about 100 images.
3. Once you find an image you’re happy with (upscale the image if desired), download your desired image, then it’s ready to use! Download your image to import.
Pro-tip: upscale images before using, this helps refine the details and makes manipulations (like tracing) smoother and higher quality.
If you can’t upscale, just download the image. If you already have an image but it’s not high enough quality, you may want to try image upscaling. Again, there are a lot of services that can do this, including getimg.ai.
(I’m not sponsored or affiliated with getimg.ai)
How to upscale in getimg.ai
Hover mouse over image
Click the “three dots” on the top right the come up
Click the “Upscale 4x” in the menu that comes up
After upscaling, download the upscaled image (format does not matter)
Step outcome: You should now have an image in your downloads folder you want to use in your project.
Importing a Typeface (if desired):
A typeface is how the font looks (such at “Times New Roman” or “Comic Sans”). If you don’t want a new/custom typeface, you can skip this step.
The design files included below use a custom typeface.
The typeface I used is free to download, if you won’t want to install this typeface, you can still use the file below, but it will use a default system typeface if you don’t install the custom typeface.
- Find a typeface (if you want a new one, if not skip to the next section):
For me, this project is for personal use (I’m not selling it) so pretty much any typeface I find will work.
If you’re working on something you will sell….
Then you’ll need to find a typeface that is free for commercial use, use a standard typeface, or purchase one for commercial use. Specifics of this are outside the scope of this project page.
I recommend starting on a free type face finder: example, Google: free typefaces to find a site. For this project, I’m going to use 1001 Fonts (note, I am not sponsored by, or affiliated with 1001 Fonts).
How to find and import a font from 1001 fonts
I want something like a tiki-type, or Hawaiian font, so I go to the home page, search for “Hawaii Fonts” and see what comes up:
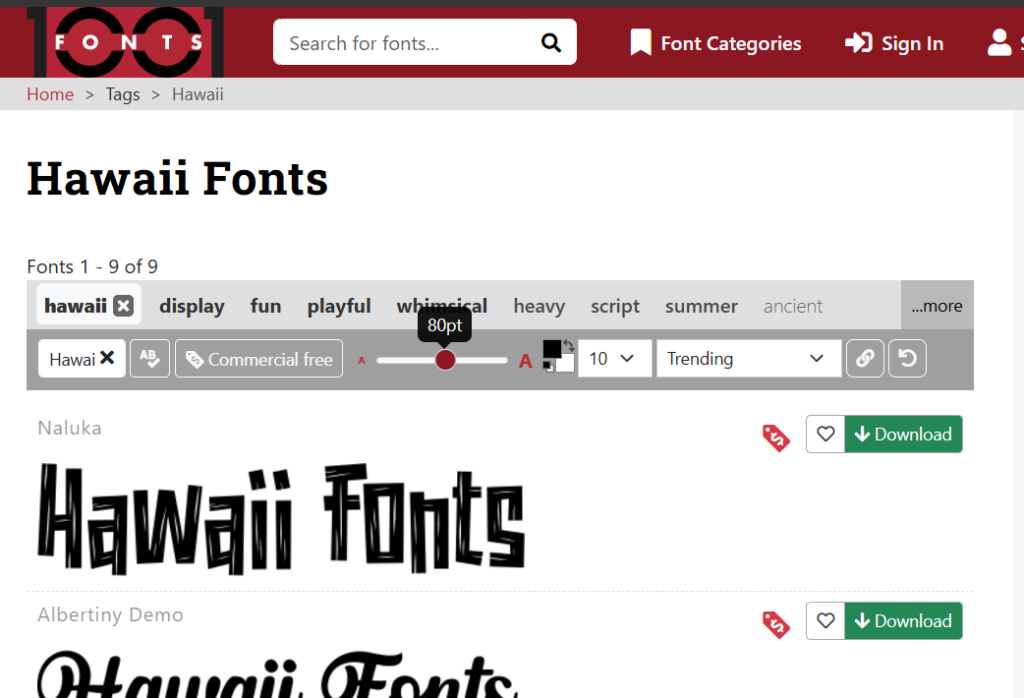
I’ll be using the first one that came up “Naluka”.
Click on the font to open the details, then download the font: here’s a direct link if needed: https://www.1001fonts.com/naluka-font.html
In this example, I found one called “Naluka” from 1001 Fonts.
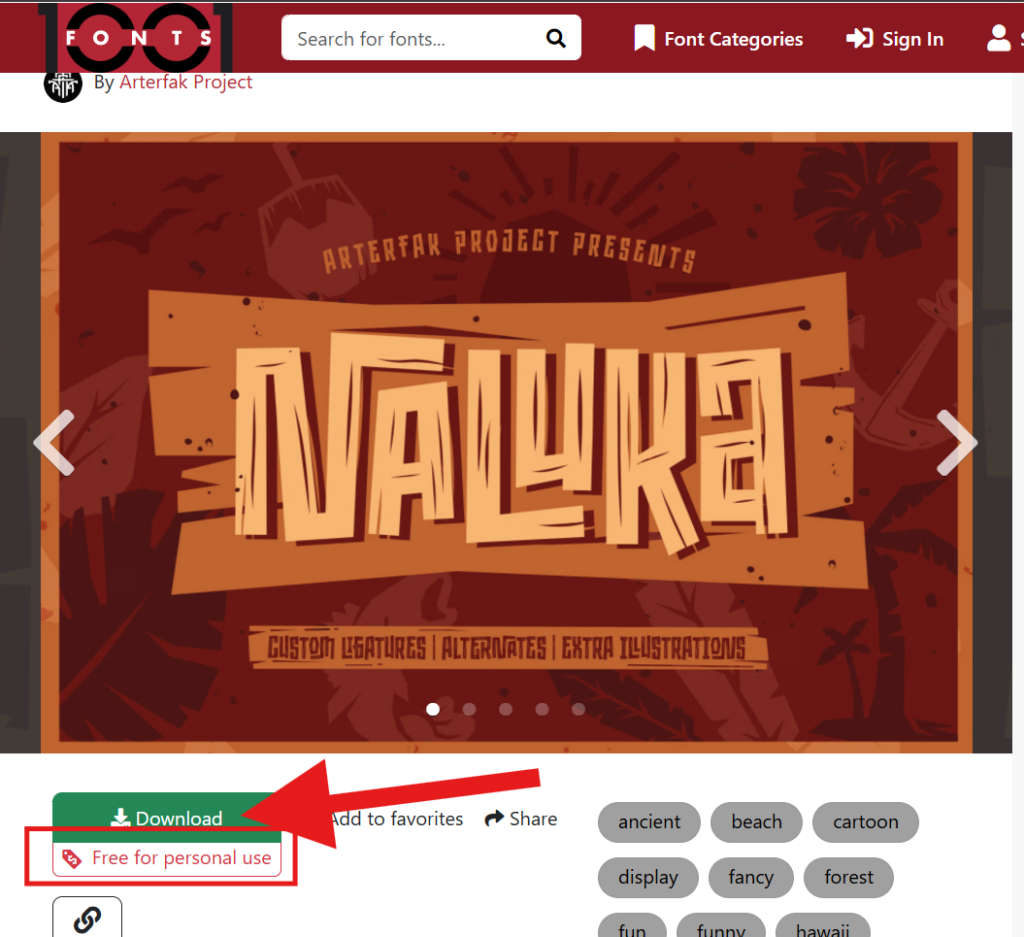
How to install a downloaded typeface
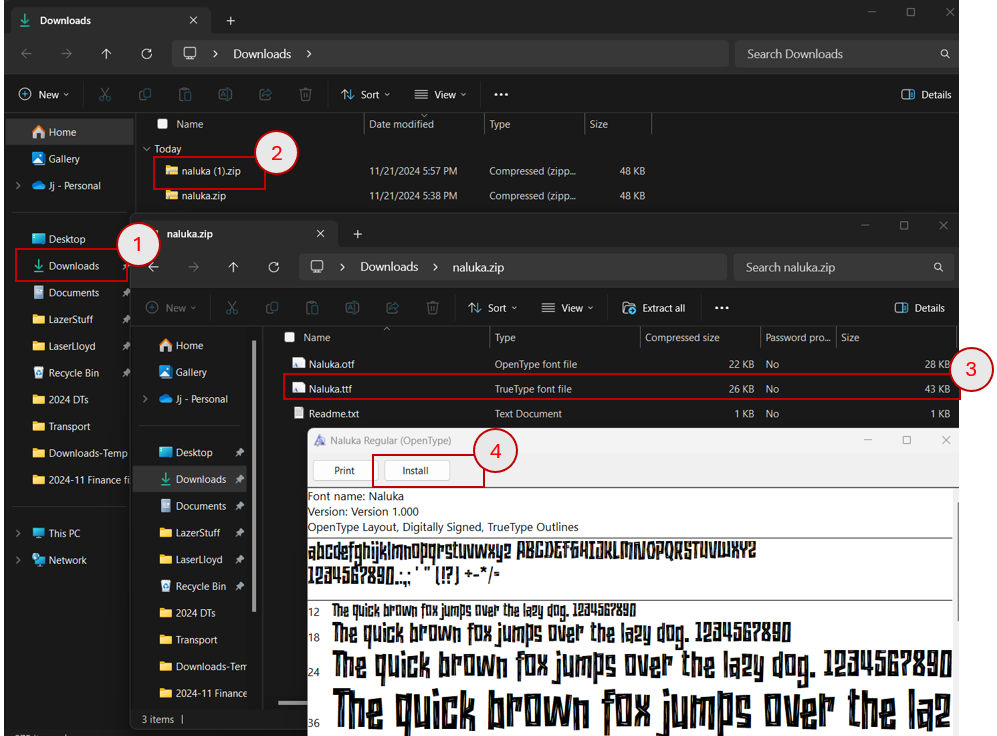
Once downloaded: open your downloads folder, and open the folder downloaded, then click the typeface and install it.
[after you have downloaded the typeface, example: https://www.1001fonts.com/naluka-font.html, then click “download”]
1. Open the downloads on your computer
2. Open the ZIP file with your font in it (what you just downloaded)
3. Open one of the font files (I typically open the largest one by file size, but any font file should work)
4. Click install
Done! You can now close out of all open windows as the font is installed.
Note: if you have any open programs you want to use the font in (such as Word, Excel, PowerPoint, or xTool) you will need to restart those to be able to use the new font.
Step outcome: You should now have any new fonts you want to use installed on your computer.
xTool Creative Space setup:
This section covers how to use xTool creative space. If desired, you can download the finished setup file below.
Note: I am not affiliated with or sponsored by xTool.
- Open the program and create a new project
Pro tip: Save early and often
I’ve lost a lot of progress by not saving my work, typically, I’ll save a project multiple times while developing it. This project I’ll save as “Fire Bear”
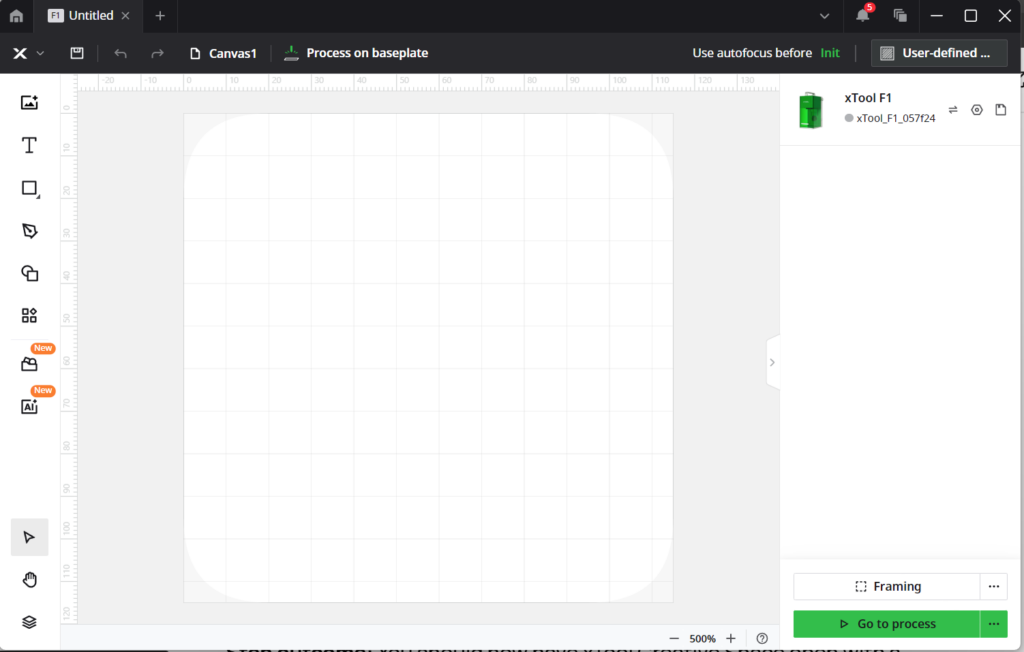
Step outcome: You should now have xTool Creative Space open with a new project.
xTool: Image Setup for Engraving
1. Import image (basically, drag the image in)
How to import your image to xTool creative space
- In the new project, click on the icon to add an image
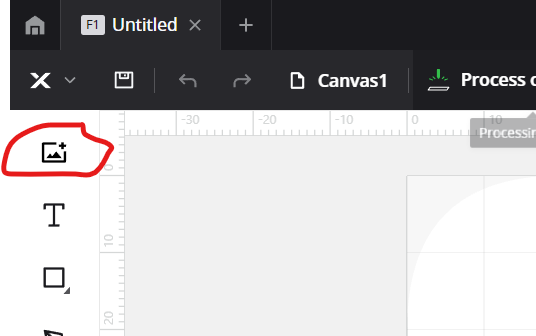
- A new window will pop up asking what image you want to import
- Select the image you generated/ downloaded to import
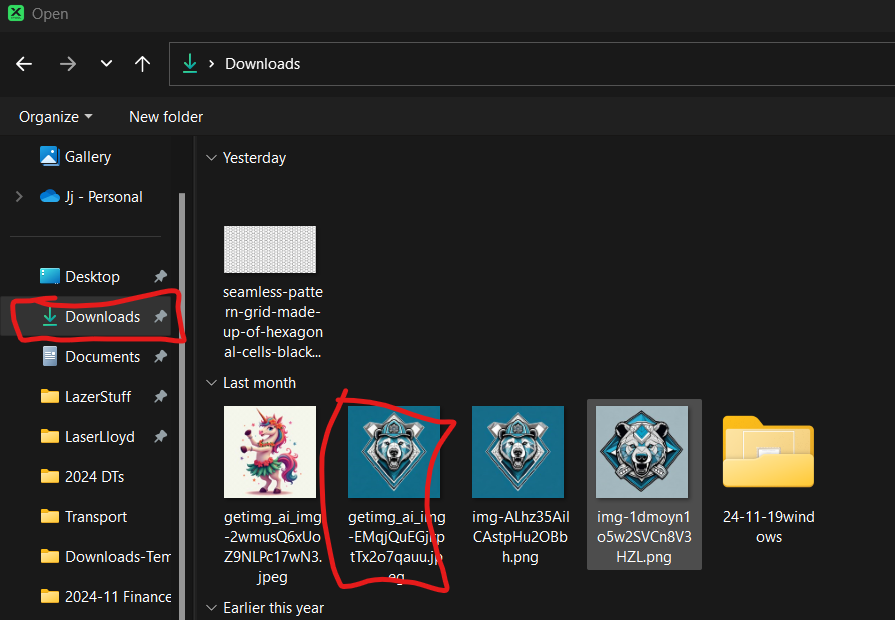
- And your image is now imported to xTool creative space
Import as original size
A window might pop up asking if you want to import the image in it’s original size, or scaled. I have a high-end system so I can process full-scale images. Choose full size, unless you experience performance degradation (such as slow processing, then choose a scaled image).
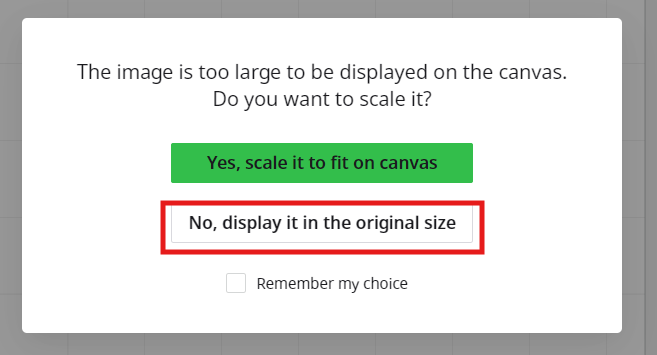
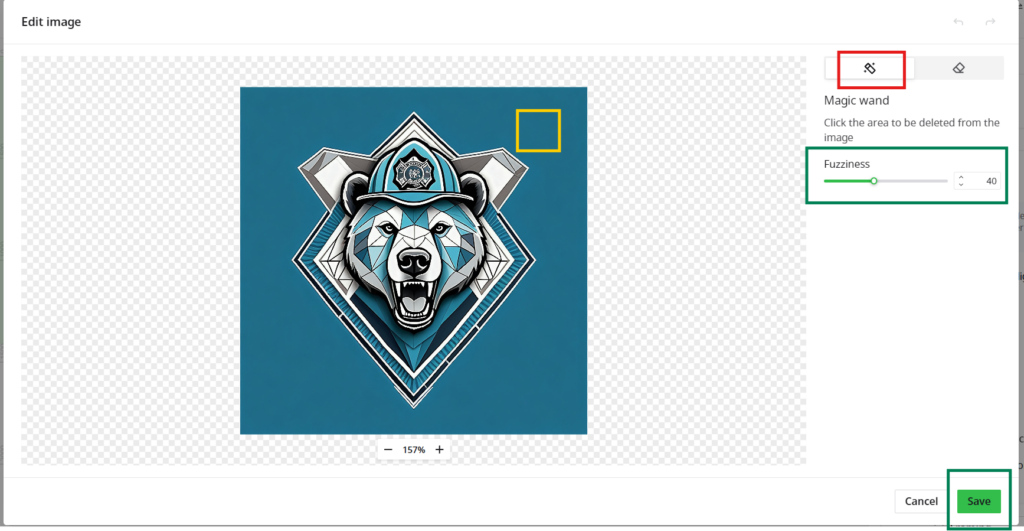
2. Edit to remove the background
How to remove a image background in xTool
- After importing the image, select the Edit function
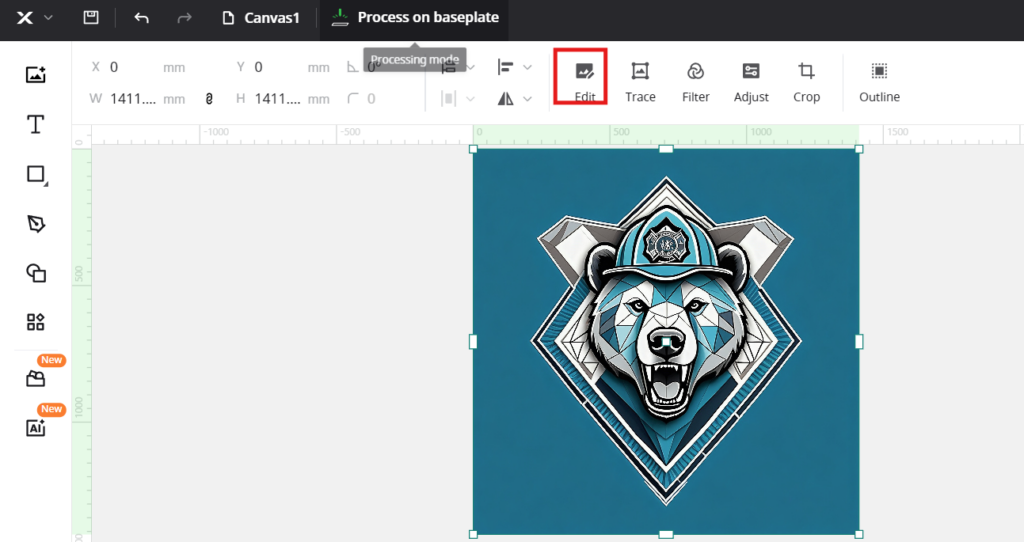
- Select the Magic Wand tool, then click in the background to remove
- If needed, adjust the Fuzziness setting to fully remove the background
- You can use the undo command (press CTRL+Z) to undo any mistakes
- When completed click Save
3. Adjust to convert to grayscale image
How to make grayscale images
- With the image imported, and background removed, select the image, then click Adjust
- A dialog box should come up with options
- Use these options to make the image greyscale
(as lasers typically engrave shades of grey, high-end ones can do color on metallic surfaces, but that’s outside the scope of this tutorial)
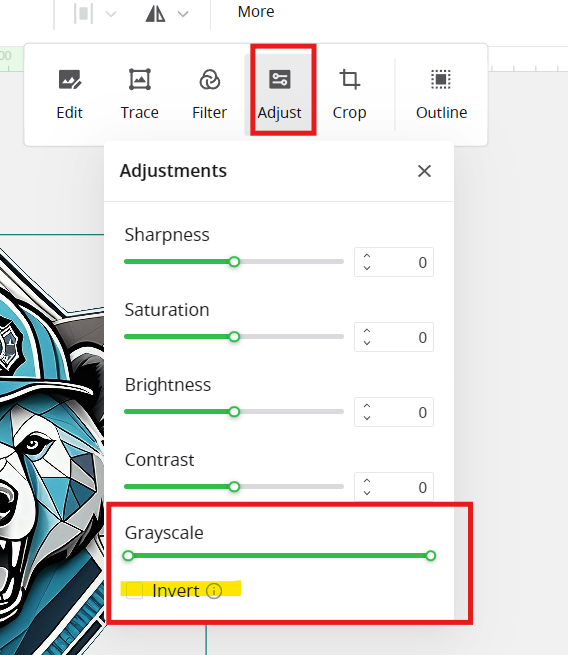
- Adjust the slider to make the image look the general colors you expect (drag the lower and upper end of the grayscale slider until you are happy with the result)
- If desired the additional sliders in this menu can be changed to adjust the entire image to you’re preference
Note: lasers typically engrave making material darker (e.g., the laser darkens/burns a material) but if you’re working with a material that lightens with laser exposure (such as coated metal, like aluminum business cards) then use “Invert” to get the correct color scheme.
- If desired the additional sliders in this menu can be changed to adjust the entire image to you’re preference
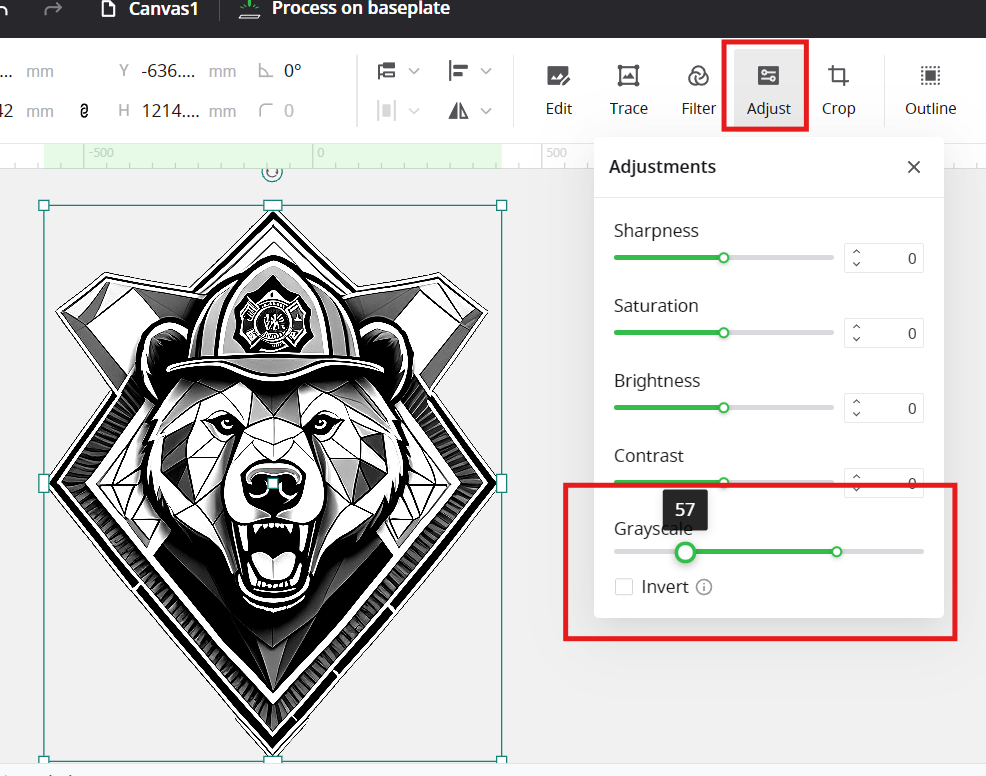
Step outcome: You should now have your image in grayscale with no background.
xTool: Arrange and Add Text
- Place image where desired
- If needed, shrink or enlarge your image to fit in your workspace
- Use the corner blocks and click and drag to scale an image
- To move, click on the image, then move the mouse over the image until a four-sided arrow shows up, then click and drag to move the image as desired.
- If needed, shrink or enlarge your image to fit in your workspace
- Add text (click on the “T” icon, and place the text in the workspace)
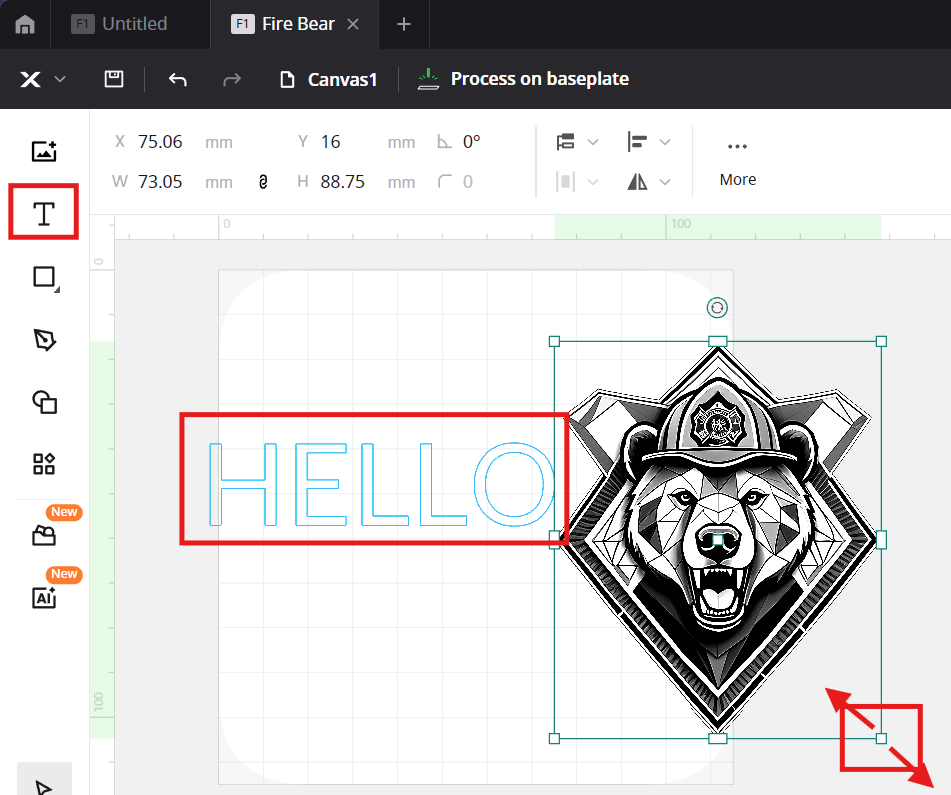
3. Input text as desired and change typeface



Leave a Reply